
Creating in Blender is a whole lot of fun. Seeing a model come to life in a game like Roblox is the ultimate in fun! It’s simple to take your models from creation to implementation. But sometimes we can run into problems importing into game engines.
In this post, we walk through exporting a model from Blender and importing the same model into Roblox. We also show how to get by the 10,000 polygon limit in many games engines, using Roblox as a guide.
Exporting Models from Blender
The two most common file types used by game engines are the FBX and OBJ file type. The FBX type has more than object data – it can contain video, 3d, 2d, audio, animation and other data. The drawback with this file type is its size can get quite large. Some game engines also have random issues supporting the FBX file type.
The OBJ file type has only the mesh data, locations of vertices and such. A nice part of this format is the small file size. It’s also quite portable. I will use the OBJ file type unless there’s a compelling reason not to.
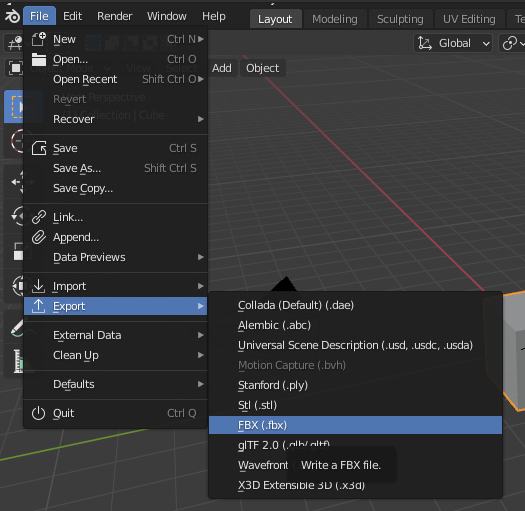
We go to File->Export and choose our file type
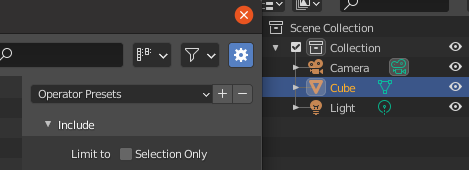
When we’re exporting, so we only get the items we are planning to import into the game engine, we select those items in our Collection display, and choose the Limit To Selection Only checkbox while exporting.
Now to import the file into Roblox.
Importing FBX and OBJ files into Roblox
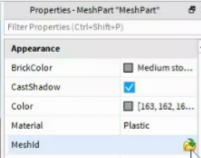
To import our object, we first add a meshpart as our container. This will allow you to attach our obj and fbx files. We go into the properties pane and select our meshpart. To select the object file, we click on the MeshID property, click the folder icon and choose our FBX or OBJ file.
It’s that easy! Now, unless you’ve baked your texture, it will be gray plastic and you’ll have to texture it in Roblox. We won’t cover that here.
Working Throught the 10,000 Polygon Limit
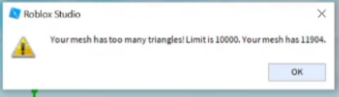
An issue you’ll run into at some point is that there are too many polygons. Currently Roblox and some other game engines have a 10,000 polygon (sometimes referred to as tris) limit. We can overcome this issue in a few ways, we can split our model and import each object individually, re-combining the full model in Roblox or any other game engine. Two other ways we can do this for smaller models is using decimate on our objects in Blender, or by removing specific geometry ourselves. I often use decimate, so let’s do that.
Just like before, we add a meshpart and select our OBJ. If your model is over 10,000 polygons, it will give an error message.
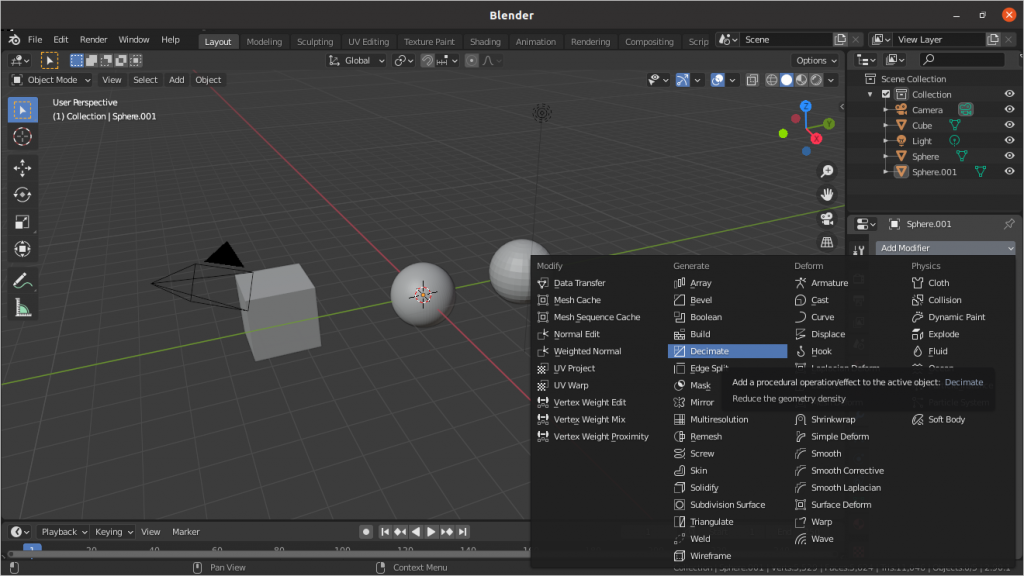
In Blender, we go to modifiers, add modifier and select decimate.
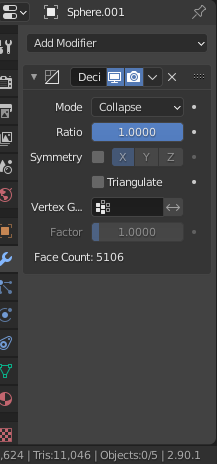
Initially our ratio is 1, that equals the full poly count of the object. So we want to drop that ratio down. We often “guestimate” what we need, and slowly adjust to get under 10,000 polygons.
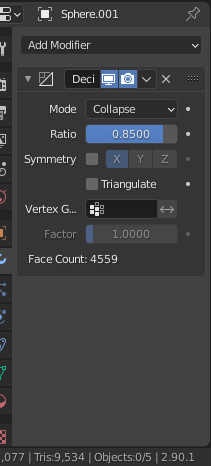
Here we moved our ratio to 0.85, and have our Tris, seen at the bottom left of the screenshot, under 10,000.
Once we have our model under 10,000 we export our model to OBJ and attach the OBJ to the meshpart just as we did above.
Wrap Up
In general, importing your Blender models into Roblox is a simple task. When you do run into issues, like the 10,000 polygon limit issue, it’s simple to use Blender’s built in tools like Decimate to quickly fix your model. If I had a model with multiple objects, I would either split those and import them one at a time, or selectively delete geometry by hand to get the model where I needed it to be.
One other issue you might run into is a model not importing, with a cryptic error message. Check the name of your model and the file. Roblox will block certain words. For example, a Bishop chess piece I had would not import until I renamed the file something else.
And that’s it! A quick and simple guide to moving your model into Roblox. You can also see this done, with further explanation, in this Youtube video
More videos to come at Coder Haus Youtube