
In a game we’re building, we’ve added news radio like audio to the game. With this, to ensure that we remain accessible to folks who are hearing impaired, or players with the sound off, we decided to add “closed captioning” of sorts to our game. Here’s how we did it!
Recording the Audio
A great open source tool used by many to produce high quality audio is Audacity. We used our trusty Blue Yeti microphone to record the initial script. What’s nice about Audacity, besides it being free, open source, and cross platform, is you can select sections and see the length of time of the selected clip. We will need this information to time our captions so let’s do this!
Our first order of business is to pick the right pattern on the Yeti. We knew that the audio was going to be coming from our kitchen area in the game, so there needed to be a bit of echo. We chose the bidirectional pattern and faced a wall to catch the echo. We also adjusted our gain until our voice was MOSTLY in the yellow on the meter, with some moments of red spikes. This is optimal for any audio you are recording.
Let’s jazz it up!
Now that we had our audio, we realized it was kind of bland.
Our story has the information coming from an old school radio in the kitchen of the apartment we’re in. So let’s try to get a radio like sound!
First, we searched sites like Wikimedia and freesound looking for creative commons sounds of a tuning radio and radio static. We found a nice clip with record static, which we felt could fit our need.
We also found a clip with a radio tuning that we feel we can use.
After adding the full radio tuning clip to our voice recording, it felt too long so we found the good bits and clipped out the rest.
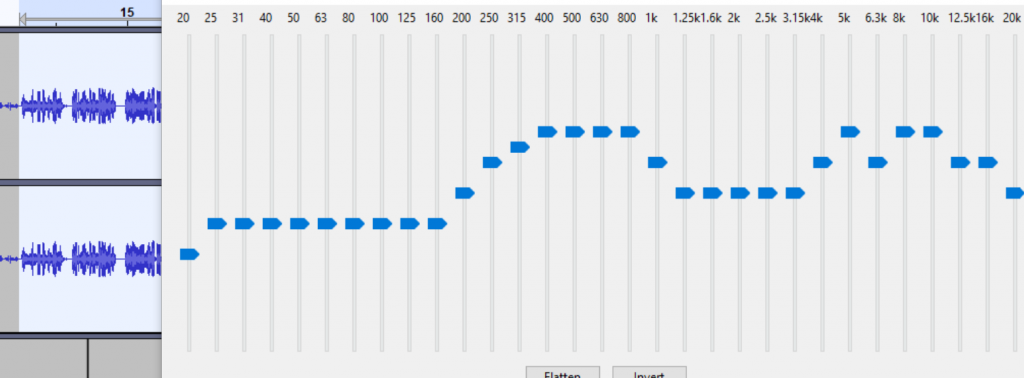
We added the static clip to a second track, and mixed it to “feel” like we’re hearing the static crackle from a radio. But the sound quality of the vocal was too good! Anyone who has had an old radio can remember the compressed, midrange forward audio that comes from AM stations. So we added some midrange, reduced the bass and gave the voice some “grit” by adding distortion to the audio. Here’s our midrange boost –
And here’s a clip of our final audio, with intro, midrange boost, compression and distortion, as well as static.
Contrast this with the original clip, the sterile bass forward recording, and it’s quite a transformation with a small amount of work.
Now to generate captions!
Generating captions for recorded audio
Above I mention two items, our audio script and the timing of our vocals that match the script. These will be key in developing our captioning solution. Let’s set up our files and write some code.
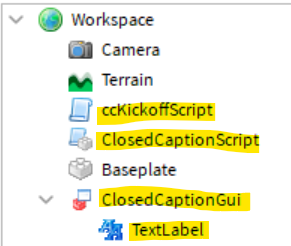
Our first order of business is to set up our file structure. We start by adding a modulescript and script to our workspace. The ccKickoffScript triggers the actions in the ClosedCaptionScript, which is our modulescript. In addition we add a BillboardGui with a text label, here named ClosedCaptionGui. All of these can be moved to more optimal places, here we leave them in the workspace for ease of development.
Our code is fairly straight forward. We want to be able to time chunks of text to audio, and either replace the current text with text from a new line, or append text to the current line. To do this we’ve set up a nested table of tables, with each line containing the following properties
text=Our text to display
delay=Number of seconds to wait,
append=Binary 1 for yes, 0 for no to append the line of text to the last
We start with our ClosedCaptionScript. We grab our TextLabel so we can add our captions to it. We also add a local variable, textTable, to hold the full range of captions.
local closedCaptionModule = {}

-- change this to match the location of the BillboardGui/Text Label
local gui = game:GetService('Workspace')
local textBox = gui:WaitForChild('ClosedCaptionGui')
local theBox = textBox:WaitForChild('TextLabel')

local textTable
This will be passed in from our trigger script. With good design, we don’t want this variable to be directly edited, so we add a setTextTable() function to actually set this variable from the outside.
function closedCaptionModule.setTextTable(incomingTable)
	textTable = incomingTable
end
We also decide, that as a nice visual piece we want to fade the last block of text once we get through our captions. This simply increases the TextTransparency by a value, incrementally.
function fadeText()
	for i = 0, 1, .1 do
		theBox.TextTransparency = i
		wait()
	end
end
And here’s our code to display the caption. We iterate through the lines in our textTable, and check the append parameter. If it’s 0, we clear the text box, otherwise we leave it to append our text. We then set the text in the box and wait for a delay time. Once completed, we call the fadeText() function.
function closedCaptionModule.displayCaption()
	for _, line in ipairs(textTable) do
		if (line.append ~= 1) then
			theBox.Text = ''
		end

		theBox.Text = theBox.Text .. '\n' .. line.text
		wait(line.delay)
	end

	fadeText()
end

return closedCaptionModule
To trigger this code, we add a trigger script that runs when the workspace loads. In it we grab our ClosedCaptionScript and set our text table using closedCaption.setTextTable(). Then we simply call our displayCaption() function. We go back to the timing we took in Audacity and time each section to ensure that we can match up the text to audio. Finally we add this to the game and verify that everything triggers at the same time.
local closedCaption = require(workspace:WaitForChild('ClosedCaptionScript'))

closedCaption.setTextTable(
	{{text='There are reports of a new disease', delay=5, append=0},
		{text='taking hold across the country.', delay=5, append=1}}
)

closedCaption.displayCaption()
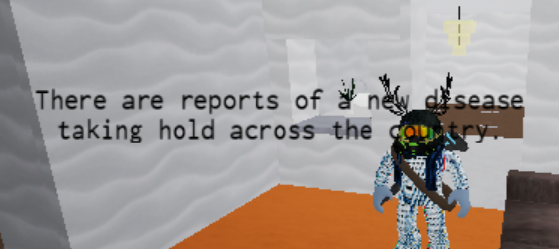
What’s not shown here is a block of code above the displayCaption() call that grabs our audio by RobloxID and triggers the play function. This allows our audio to begin right before out captions. And here’s the final result.
Wrap up
We’re still working on an optimal place to display the text, and adjusting colors and text size for our players with visual impairments. While the solution is simple, it allows us to add some depth to our game, while allowing our hearing impaired players to still get a major part of the story line.